Pages

Monday, December 20, 2010

To Two of Our Favorite People...


We love you and miss you very much!

Hopefully by now you have received our delivery. We wanted to make your holiday more scrumptious - we hope you don't mind! And if you need some suggestions, try this, this and this.

And for the rest of you, here's my mom's ultimate lasagna recipe (you know, the kind of recipe that grown men want their wives to make "just like my mom did").

Ingredients:
Italian sausage
Jar of your favorite spaghetti sauce (a.k.a. Prego)
Large container of ricotta cheese
2 eggs
4 cups shredded mozzarella, divided
Box of dry lasagna noodles

Directions:
1. For the sauce, brown the italian sausage and add the spaghetti sauce to it.
2. For the cheese mixture, combine 3 cups mozzarella cheese, 2 eggs and container of ricotta cheese.
3. To layer the lasagna, begin with about a cup or so of sauce on the bottom of a 9x13 pan. You'll want enough sauce so that the bottom of the pan is completely coated. Next, add a layer of dry noodles. Top the noodles with a layer of the ricotta mixture followed by more sauce. Repeat the layers: noodles, cheese, sauce. Top with the remaining mozzarella cheese.
4. Refrigerate the lasagna for a few hours to allow the flavors to blend and the noodles to soften. Bake at 350 degrees for 40 minutes, let sit for 10 minutes.
5. Serve to your ravenous eaters and hear them proclaim "This is better than my mom makes!"

Saturday, December 11, 2010

December 11th

How we're surviving the blizzard:


Drying our snow-laden clothes


Listening to a favorite Christmas album


Checking items off the to-do list

Aaaaaaand........DONE!

Photographic proof of why my house isn't clean, my tree is undecorated and my children are in yesterday's clothes:


So, yeah, didn't happen...

Remember this? Yeah, didn't happen. Didn't think it would, but I really wanted to try. Oh well.

All is not lost, though. I am still going to try to recapture the last week in pictures and words. Here goes:

December 4th
Got a late start to a birthday party. Tried desperately not to get stressed about it. Managed to succeed pretty well until I got lost on the way there. Showed up an hour late.

Inhale.

Exhale.

The kids had a great time. It was a circus theme, complete with this cake:
Left the circus party to join another party, but discovered on the way that the second party had been cancelled. No loss. We headed home instead. Turned into our alley, drove to our garage and attempted to park in the garage. Got stuck. Backed up and tried again. Got stuck. Back up. STUCK.

Finally, a neighbor took pity on me and spent a good 20 minutes shoveling and pushing to get me freed from my snowy constraints. When I was mobile again, I drove away down the alley and proceeded to get stuck again trying to turn onto the street. Three more men, 20 more minutes, many curse words and a prayer or two were all that was needed to free me a second time.

Inhale.

Exhale.

Spent the rest of the day in the house.

December 5th
With final dress rehearsals breathing down my neck, I skipped great grandma's tree-decorating party and finished up the costumes. Joe and the kids were able to enjoy a few hours of family and evergreens without the costume grinch. They were happy.


December 6th
First of the final dress rehearsals. Still a few costumes/alterations outstanding, but nothing that would impede the show. Elliot and Betsy were great sports again and made it possible (and easy) for me to help. Such good kids.


McDonalds for dinner.


December 7th
Ah... a break from the costume madness. With only a few last-minute alterations to sew, I was able to clean up a lot of the mess in my living room. Still not back to normal, but SO. MUCH. BETTER. (Also worked on a cute present for a little one for the holidays. I promise to show it off soon.)


Made beef tenderloin, mashed potatoes and salad for dinner. I thought I owed my family a nice meal since we've been eating crap for weeks (see December 6th).


December 8th
More dress rehearsal... More costumes... More kids... More broadway...


What more can I say?


December 9th
Today's the day of the first performance. The little thespians stay after school, run through the play a final time, have a pizza party in the cafeteria and then dress for their first performance. I skipped the run through and pizza party. I needed the break but, more importantly, my kids would have needed therapy if I'd forced them to stay at school another day.


In fact, as it turned out, my oldest needed a trip to the principal's office. It seems that all these practices and time at school have been too much for him and he was misbehaving in class. Thankfully, the end is near.


So I arrived at school in time to help the performers with hair and make-up. To put it nicely, the energy was amazing - the kids were literally climbing the walls they were so excited.

Saturday, December 4, 2010

Yum!


For lack of a better name, I'm calling these Tella Truffles. I thought about calling them "Hawkeyes" because the recipe was inspired by a recipe for "Buckeyes," but who wants to eat a hawk's eye? Not appetizing. So Tella Truffles it is.

And I know you want to learn how to make them! So here you go. Tell a friend about 'em. Or don't. You may just want them all to yourself.

Tella Truffles
1/4 cup (2 oz) cream cheese, softened
1 1/2 cups Nutella
1 cup graham cracker crumbs
pinch of salt
2 2/3 cups powdered sugar
16 Tbsp (2 sticks) butter, divided, melted and cooled
1/2 bag of pretzels, crumbled

1. Combine cream cheese, Nutella, graham cracker crumbs, salt, powdered sugar and 12 tablespoons of butter together in a large mixing bowl. Stir until well combined.

2. Using whatever device you have on-hand (e.g. portioned scoops, two spoons, your fingers), form the dough into 1" balls and place on cookie sheet lined with parchment or wax paper.

3. Once all of the dough has been "balled," place the cookie sheet into the fridge or freezer until the balls have hardened. If you place them in the freezer, be sure to remove them after 20 minutes so that they don't freeze all the way through.

4. Roll a hardened truffle first in the melted butter and then in the crumbled pretzels. The extra butter is optional, but I find that it helps the pretzels adhere. And the pretzels should be crumbled small enough to adhere to the truffle, but not so small that it's all powder.

They really are delicious and would make a great addition to any cookie platter. Enjoy!

Day Three - December 3rd

After battling Betsy's stomach bug on Wednesday night and Thursday morning, today was thankfully a low-key day. Betsy and I picked up a few costumes that needed alterations, shopped for a few essential groceries and then spent the rest of the day at home. Bliss.

Sam, Ella, Oskar and Kaisja joined Elliot and Betsy after school, tripling the noise but seriously reducing the boredom. We're finally at a stage where playdates are fun for the parents AND the kids.

There's a snow storm on its way. We're expected to get 5-7 inches with a low of 15 degrees and a high of 20. Seems tomorrow will be another low-key day too.

Friday, December 3, 2010

Day Two - December 2nd

The cleaning lady (i.e. me) arrived today. She's been neglecting our house for awhile now, muttering things like "costumes" and "broadway" with this crazed look in her eye. Whatever her excuses, I'm glad she finally put sponge to hardwood and whipped this place into shape. The dust bunnies were beginning to colonize, the bathroom had seceded and a mutiny was being led by the laundry. It was starting to get ugly.

Thursday, December 2, 2010

Let's See If I Can Do This...

For a long time now, I have followed along as Ali Edwards documents the month of December in her December Daily projects. Each year, I fantasize about making my own album. I even start out the month taking photos each day and documenting our lives. It never lasts. Some years I get all the way to the 10th, other years I'm lucky if I remember it's December.

This year I'm trying it again. I would say that I. AM. GOING. TO. DO. IT! But, let's be honest, I'm probably not going to capture a month's worth of photos and memories. OR. I might get the photos and journaling done, but never actually make an album. I'm just being honest here. I like to start projects - I'm just not very good at finishing them. Regardless, here goes:

December 1, 2010:
Spent an hour helping in Elliot's classroom and the rest of the day at Kids On Broadway.

Why? I ask myself the same question ALL. THE. TIME! And the simple answer is that I want them to have a sense of community. I want them to grow up with a family (both by choice and by chance) larger than the four of us. I want them to know we support them, their interests and their education. And I want to do the same for the other people in our community.

So we're working our rears off! Both kids were super-troopers at practice. They kept themselves entertained and were in good spirits the whole time. What a blessing it was not to have to worry about them constantly.

It was a long, exhausting day, but good for the spirit and the community!

Tuesday, November 23, 2010

A Giveaway I Didn't Want To Miss (And You Shouldn't Either!)

Over at TodaysMama they are having a fantabulous giveaway in conjunction with GameStop. You should head over there and enter to win (but continue reading this first!). And if that's not enough, Cathy Z has a giveaway from them too. Check out her blog for a chance to win another great prize.

TodaysMama and GameStop are giving away a sleighful of gifts this holiday season and to enter I'm sharing this meme with you.


1. What is your holiday wish for your family?
I wish for continued growth (I do have little kids, you know), good health and bundles of happiness. What else is there?
2. What is your Christmas morning tradition?
Mom and Dad head downstairs first while kiddos wait upstairs (making sure to stay out-of-sight). Then, when cameras are ready, the kiddos come down the stairs to see what joys Santa left for them. The next 30 minutes include squeals of delight, shreds of wrapping paper and little plastic pieces everywhere. When all the gifts have been opened, we eat breakfast and get dressed for a day of celebrating with extended family.
3. If you could ask Santa for one, completely decadent wish for yourself, what would it be?
We have a first edition 1930s kitchen, complete with drawers that lose bits of wood when you use them, only two outlets in the whole room, a sink that's literally sinking into the cupboards below and a makeshift 2x4 island to increase our counter space from 8 square feet. I'd LOVE to get a revised second edition kitchen if Santa could spare a few elves to make it happen.
4. How do you make the holidays special without spending any money?
We decorate the Christmas tree and living room together (while sharing and making special memories). We bake cookies, decorate gingerbread houses and share our homemade goodies with others. And, best of all, we roast marshmallows in the fireplace. I'm sure Mary and Joseph didn't do that, but we still like it anyway.
5. What games did you play with your family growing up?
My siblings I used our imaginations a lot and made up our own games. Blockade, Spaceships and Rock Band were just a few of our favorites.
6. What holiday tradition have you carried on from your own childhood?
Drinking eggnog while decorating the Christmas tree together.
7. Where would you go for a Christmas-away-from-home trip?
It just wouldn't feel like Christmas if I weren't surrounded by all my family (parents, grandparents, aunts, uncles, etc), so my destination of choice would be wherever I could go with 100 people in tow.
8. Check out GameStop and tell us, what are the top three on your GameStop wish list this year?
Xbox 360/Kinect bundle, along with the fitness and sports bundles to play on it.

Monday, November 22, 2010

Menu Planning Part 3

The first week, we picked our meal categories and brainstormed ideas for each category. The second week, we added our categories and meal ideas to a menu calendar and started our meal-management system.

This week, I'll share with you seven tricks I use to make food prep and planning a little easier.

Tip 1: Plan ahead.
One of the benefits of having a weekly meal plan is that you can think ahead to the things you might need later in the week and plan accordingly. For example, if you are serving steamed broccoli two nights, wash and cut it the first night you serve it and save the already-prepped broccoli for a second night. Or, better yet, wash and prep whatever you can over the weekend so that mid-week meals are as seamless as possible.

Tip 2: Repurpose leftovers.
For example, one of my favorite things to do during cold weather months is add leftovers into soup. I have found that my family really likes the Bear Creek dry soup mixes. Have some steamed broccoli that needs a home? How about some Cheddar Broccoli Soup? Leftover pork roast? Add it to Tortilla Soup. Not only is it a great way to repurpose foods, but the soup mixes are easy to make and ready in less than 30 minutes.

Tip 3: Stock your pantry.
I'm not just talking about the convenience dinners like Mac & Cheese (although those do come in handy). There are plenty of dinners you can make from a few ingredients you probably have in your pantry right now. Casserole dishes, pasta dinners and easy pan sauces all have their humble beginnings in the pantry. Stock it well and you'll have an easy dinner even when the fridge is bare.

Tip 4: Develop a freezer storage system (see tip #5 for why).
You will need freezer tape (available in the grocery store in the food storage area), colored permanent markers and storage containers. You can either invest in freezable storage containers and plastic bags or a vacuum-sealer. There are pros and cons to both ways of storing your food, but I've tried both and prefer the containers. But whatever the food goes into, use your colored markers and freezer tape to label it. Why the colored markers? To easily identify whether or not it needs to thaw first. For example, if the item can go from freezer to oven, then use a green pen to label it (name and directions). If it first needs to thaw in the fridge, label it red. Doesn't matter (or, in my case, too lazy to find a colored pen) use black. Why the freezer tape? It's not necessary, but I find that freezer tape works much better than regular masking tape or marking right on the container.

Tip 5: Make the freezer your friend.
A well-stocked freezer can save you hours of headache. And how do you get a well-stocked freezer? You start by making double batches of the foods you like. I made Bolognese Sauce a few weeks ago, labeled it and stuck it in the freezer.


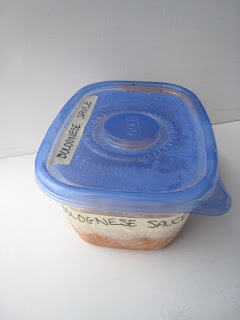
The next pasta (or ethnic) night that I know will be hectic, I'll just pull it out of the freezer and use it. I've got enchiladas, meatballs, cookie dough and soups that all started as double batches.

Another way to stock your freezer is to portion out leftovers and freeze them. For example, when I make soup or pasta dishes, I will store the leftovers in single-serve containers and use them for lunches or desperate dinners.

Tip 6: Make the slow cooker your friend.
Yes, you are developing a lot of friendships these days. But trust me, these are the kind of friends you want. The slow cooker makes rice and beans (see tip #7), makes meals while you're gone, and in return asks only that you clean it after each use. What's not to like about a friend like that?

Tip 7: Buy in bulk and portion smaller.
For example, if you are trying to eat a lot of beans, buy a large bag of dry beans, cook them in the crockpot and store them in the freezer. Then, when you are ready to use it, you'll have your foods already portioned and ready to use. Or start some bread dough. The recipe makes enough for 4 loaves and keeps in the fridge for up to 2 weeks - you can have freshly baked bread any night of the week.

Wednesday, November 17, 2010

A Math Equation

+
=
A surprisingly good brownie
Here's what you need to do:
1. Drain and rinse the can of beans. Then pour the beans back into the can and fill the can back up with water. Pour the beans and water into a food processor or blender and puree. Get it as smooth as you can, but you'll probably still have some bits of skin.
2. Combine the brownie mix and bean puree together in a mixing bowl and stir until well combined (it'll be pretty soupy). Pour into prepared pan and follow package directions for baking.
Enjoy!

Tuesday, November 16, 2010

Kids Say The Darndest Things #347

Yesterday, while Betsy and I were sitting down to circle time at preschool (I attend class with her on Mondays), I pointed out her teacher's pretty leopard print scarf. Betsy, not missing a beat, stood up and said,

"Teacher Angie, guess what! Your scarf is the same as my underpants!"

Monday, November 15, 2010

Menu Planning Part 2

Last week, we began by creating our dinner categories and compiling a list of meal ideas for each category. Now it's time to put our plan into action.

For this next step, you'll need a calendar, a three-ring binder and some sheet protectors (these are optional, but encouraged). Using your calendar, under the day of the week, label your categories for a one or two-week period, depending on the number of categories you have. Then, in the boxes, add in meal ideas from your meal lists (don't worry about take-out and CORN nights). You now have a working calendar of meal ideas for one or two weeks.

If you have only a few tried and true recipes (and not enough to fill 14 nights worth of meals), then add a "Try Something New" night to your menu plan. Before too long, you'll have more meal ideas than nights to cook them!

Here's a sample of a week's worth of meals at our house:
Monday (Vegetarian): Pan-seared fish with salad
Tuesday (Pasta): Spaghetti and meatballs with salad
Wednesday (Soup): Crockpot Stew with homemade bread
Thursday (Ethnic): Sausage and beans with steamed broccoli
Friday (CORN): Clean Out Refrigerator Night
Saturday (Beef): Pizza (yes, this is a loose interpretation, but that's okay!)
Sunday (Poultry): Chicken fingers with steamed broccoli

Next, add your calendar (if possible) and lists of meal ideas to your binder. The calendar I use is attached to the wall, so it isn't possible to add it to my binder. But if you are printing up a calendar especially for this or have one small enough to fit, I would recommend adding it to the cover or first page of your binder. After the calendar, put each category list in its own sheet protector. Finally, behind each category list, add in the actual recipes (in their own sheet protectors) or notes on where to find the recipe (e.g. the cookbook name and page number).

Here are a couple of examples from my binder:


Before too long, as you add new recipes and create more menu plans, your binder will start to look like this:

And for those who struggle with getting home-cooked meals prepared with little time to prepare them, stay tuned! Next week I'll share some tricks I use to help get meals on the table with as little effort as possible.

Saturday, November 13, 2010

The Snow Finally Arrived

The first snow fall of the season happened today (and is STILL happening). It started about 1am this morning and hasn't stopped. Bummer for those of us with sidewalks to shovel and places to be, but great for kiddos, dogs and snow mice.


Thursday, November 11, 2010

What I've Been Up To

Question:

What do you get when you add an over-zealous volunteer and a Type A personality?


Answer:

When Elliot started kindergarten, I knew that I wanted to be as involved in his school as my schedule would permit. Not only did I want my family to feel like we were part of a larger community, but I also wanted my children to have the advantage of my involvement in their education.

My schedule didn't really allow me to help out much last year. I did the best I could, but I wished I could have done more. So when the volunteer sign-up came home from school this fall, I jumped right in with both feet. And when I jump in, I JUMP IN.

I'm now in charge of the costumes for the school's winter musical, which is a revue of six different Broadway musicals. The school already has a supply of costumes from years past, but most of the costumes need alterations and some need to be made from scratch.

Here's what I'm making:
  • 10 school-girl skirts
  • 7 peasant outfits (skirt/top or dress)
  • 4 mermaid tails and tops
  • 1 seagull costume
  • 1 fish costume
  • 1 police uniform
  • 60+ bowties
There may be more eventually, but right now that's just enough to make it look like a bomb's been detonated in my living room.

Monday, November 8, 2010

Menu Planning Part 1

I am sure that many of you are just like me - you struggle to figure out what to cook for dinner each night. Some weeks are easy - the fridge is stocked and the kids are cooperative - but other weeks the struggle seems never-ending.

One of the easiest things you can do to lessen the meal-time madness is to develop a weekly meal plan. There are online tools to help with this (such as http://www.e-mealz.com/), but I've developed a plan that works pretty well for me. Hopefully, it will help you too!

First, create a list of general food categories. The categories should fit your family and lifestyle. Love take-out? Make it a category. Can't live without your comfort foods? Make it a category. Other categories could include anything from poultry and pasta to Asian and C.O.R.N. (Clean Out Refrigerator Night). To simplify the process, you'll want to create either 7 or 14 categories (one or two weeks' worth).

Second, assign each night of the week (or two weeks) with a category. As you are doing this, keep in mind what day of the week you shop and which foods spoil most quickly. For example, if you eat a lot of seafood, you'll want that night to be close to your shopping day. Also, keep in mind any weekly routines/conflicts you might have. Are Mondays crazy? Then make sure whatever you plan for Mondays is quick and simple.

I like to try many different recipes, so our categories are pretty flexible. Here's what our week looks like:
Monday - Vegetarian/Seafood
Tuesday - Pasta
Wednesday - Soup
Thursday - Ethnic
Friday - C.O.R.N. or take-out
Saturday - Beef/Pork
Sunday - Poultry

Third, make a list of possible meals within each category. Label the top of a sheet of paper with your category, grab your kids and your cookbooks, and then fill each page with your favorite recipes (you only need to list the name here). If you have categories like take-out or CORN, you obviously won't need to do those. And remember, some foods can fit more than one category. For example, macaroni and cheese could be a pasta dish and a comfort food, so put it on both lists. And if you get creative with your side dishes, be sure to create a category sheet for those as well.


Here are some of the meals on our lists:
Vegetarian - breakfast-for-dinner, fish filets, salmon burgers
Pasta - spaghetti and meatballs, pumpkin pasta with sausage
Soup - baked potato, tortellini white bean and spinach, tomato basil
Ethnic - chorizo and beans, quesadillas, peanut butter noodles
Beef/Pork - hungarian goulash, beef stroganoff, pulled pork sandwiches
Poultry - crispy chicken, chicken fingers, chicken and rice
Sides - sauteed spinach, steamed broccoli, balsamic green beans

You've now got the beginnings of a great meal plan. Next week I'll show you how to implement the plan.

Saturday, November 6, 2010

A Family Tradition

I dedicate this post to Do-Wrong, Flip-Out and Banana. May the next generation know the joy (and frustration) of footie pajamas.


Thursday, November 4, 2010

Celebrity Green Drinks

Dr. Oz recently shared the recipe for the green drink he enjoys every morning. And Martha Stewart also has a recipe she enjoys. So I thought I'd give them a try and see which one I like the best. Here are a few I found:

Mehmet's Recipe:
2 cups spinach
2 cups cucumber
1 head celery
1/2 inch or teaspoon ginger root
1 bunch parsley
2 apples
juice of 1 lime
juice of 1/2 lemon

Combine all ingredients together in a blender. This makes approximately 28-30 ounces, or 3-4 servings.

Martha's Recipe:
2 cups spinach
2 english cucumbers
1 green pear, such as Anjou, halved
2 slices lemon
1 (1-inch) piece ginger

Juice all ingredients together in a juicer. Stir and serve.

Donna Karan's Recipe:
5 apples
1/2 bunch celery
1/2 bulb fennel
1 cucumber
1/2 head romaine lettuce
1 (1-to-2-inch piece) ginger root
1 lemon, peeled
2 cups kale, spinach leaves or parsley sprigs

Juice all ingredients together in a juicer. Divide evenly between two glasses and serve.

The Verdict:

Hands down Martha's recipe wins. I'm sure a large part of her win is the difference between juicing and blending the foods. I don't have a super-duper blender, so there was a texture to my "Dr. Oz drink" that I didn't find appealing. Donna's was a close second to Martha's, but some of her ingredients were foods I don't normally have on-hand. And, therefore, Donna's score was deducted for unusual ingredients. So, Martha wins again!

Wednesday, November 3, 2010

I Really Did Take The Scissors Away This Time

The other night I noticed an odd tear in the curtains in our dining room. 

It's too high off the ground for a mouse or other small animal to have chewed on it.  And it's too low for a chair or other piece of furniture to have snagged it.  It almost seems to be at child height.  Hmmm...

On a completely unrelated note, for those who asked, here is a picture of Betsy's latest haircut.  When you look at her head-on, it isn't obvious that she cut her hair, but she doesn't look the same either.  Here are some top-down photos to give you a better angle on the damage.

Monday, November 1, 2010

Getting Ready for Cold Weather

Here's a little tutorial that will, hopefully, help all you moms make it through the winter with your sanity intact.

How to Make Mitten Ribbons:

Supplies Needed:
  • Child
  • Mittens
  • Coordinating ribbon and thread
  • Sewing machine

First, measure your child's arm span from fingertip to fingertip.  To this measurement, add 2 inches per arm for drop and 1 inch per arm for seam allowance (for a total of 6 inches).  In my case, my daughter's arm span was 34 inches, so my total was 40 inches.  Cut your ribbon to this length.
Second, fold one end of the ribbon in on itself so that a faw edge isn't exposed.  Next, pin it to the inside of the mitten on the palm side.
Third, sew the ribbon and mitten together being sure to sew along another seam line or as inconspicuous a place as possible.

This is what the inside and outside of the mitten will look like:


Repeat this process with the other mitten, being sure to keep the ribbon untangled and attached to the palm side.  Once both mittens are secured to the ribbon, thread each mitten through a jacket sleeve (making sure it is the appropriate hand) and you're done!
If you wish, you can make your Mitten Ribbon longer than your child's arm span to allow for growth.  If you do this, simply knot the ribbon inside the jacket until you need the extra length.  And give a big WOOT! for never losing a mitten again!

Sunday, October 31, 2010

Trick Or Treat

"Okay, kids, let's take a cute picture of the two of you in your costumes!"
"Betsy, that's not cute."
"Let's try again.  Give me big smiles!"

"Betsy, this isn't funny.  Knock it off."

"Last chance.  Please, let's take a cute picture with big smiles.  "


Saturday, October 30, 2010

I Wouldn't Want to Meet Her in a Dark Alley

Betsy, while playing outside with a neighborhood friend, asked, "Do you want to play ninjas or Barbie ninjas?"

Friday, October 29, 2010

Pumpkin Butter Love

I just made pumpkin butter and the house smells heavenly - a mixture of clove, cinnamon and citrus.  It's exactly how a kitchen should smell on a crisp autumn day!  And I know you are dying to find out how I did it so your house can smell just as divine.

First, you need pumpkin puree.  You can either use pumpkin from a can or make your own.  I chose to make my own.  To do this, cut the pumpkin in half, clean out the middle, wrap it in aluminum foil and bake (with the cut side up) at 325 until soft.  The cooking time varies depending on the size of the pumpkin, but should be around an hour for a small sugar pumpkin.

Once your pumpkins are cooked and cooled enough to handle, scrap out the meat and discard the flesh.  Process the pumpkin meat in a food processor or blender until creamy.  You now have pumpkin puree!  This puree is perfect for soups, pastas and pies, so scoop some into freezer-safe containers and save for a rainy day.

Now it's time to make pumpkin butter!  Pour the remaining puree into your slow cooker.  You're going to need A LOT of puree.  The puree reduces by about half, so if you want 12 half-pint jars you are going to need 6 quarts of puree.  To the puree, add sugar, spices, lemon juice and lemon zest.  The quantities of each depend on your person tastes.  To 4 quarts of puree, I added 3 cups brown sugar, 2 T minced ginger, zest of 1 lemon, juice of 2 lemons, 3 tsp cinnamon, 1/2 tsp nutmeg, 1/2 tsp clove. 

Place the cover on your slow cooker, leaving room for steam to escape.  I used a couple of dowels, but you could also use spoons or just leave the lid askew.  Set your slow cooker for low and cook until desired consistency is reached, about 10+ hours.  If you have more puree than will fit in your slow cooker, add additional puree as the pumpkin butter cooks down or, alternately, make your pumpkin butter in batches. 

Once the pumpkin butter has reached the desired consistency, ladle into containers (being sure to leave head space), allow to cool to room temperature, and freeze.

It's great on toast, bars or even as a maple syrup substitute on waffles and pancakes (which my kids LOVE)!

Happy Eats!

Tuesday, October 26, 2010

Betsy's Beauty Parlor The Fourth

Alternate Titles for This Blog Post:
  • DIY Haircuts: A Tutorial by Betsy
  • Oops, She Did It Again
  • Apparently, I'm Up For Mother of the Year
  • Child-safe Does Not Mean Betsy-safe
  • WTF!?!
For those not keeping track, this is Betsy's FIFTH time taking scissors to hair. The first, third and fourth times Betsy-doll received the ole snip snip. The second and fifth times were Betsy herself.

The first time, I was ambivalent. The second and third times, I laughed, cried, and laughed again. The fourth time, I shrugged (that poor doll!). But the fifth time has left me seriously questioning my parenting skills.

Thankfully, her hair is still growing out from last April, so the damage isn't too obvious. But still!

Now, if you'll please excuse me, I need to incinerate all of the cutting implements in our house.

Sunday, October 24, 2010

Featured on Ohdeedoh


Elliot's 2006 Halloween costume was featured on Ohdeedoh today! Go check it out!